Basic Frame Layouts
Frames allow you to divide a browser window into multiple regions,
each of which can display a different HTML document. In most common uses of
frames, one frame displays a document containing navigation controls, while
another frame displays a document with content.A frame-based website involves three basic parts: a frameset page,
the individual
HTML documents that are to appear in each frame, and
target names for each pane of the frame layout.
Choosing a Frameset
1. Dreamweaver provides a number of "Framesets," or document
templates that contain various configurations of frames. To find a frameset
to start with, click the File menu and choose New. 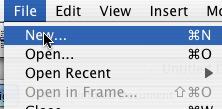 2. Choose a frameset style by clicking the General tab at the
top of the window, then choosing Framesets from the left-hand menu. In the
center menu, scroll through the available framesets and choose the one that
best fits your needs. When ready, click Create to go to your new frame documents.
2. Choose a frameset style by clicking the General tab at the
top of the window, then choosing Framesets from the left-hand menu. In the
center menu, scroll through the available framesets and choose the one that
best fits your needs. When ready, click Create to go to your new frame documents. 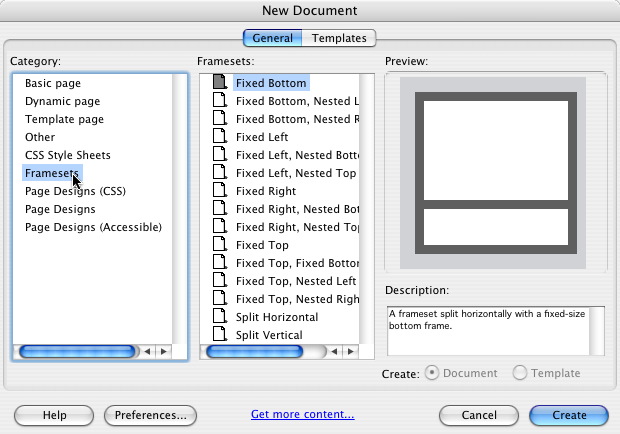 3. Note that at first you are viewing the Frameset page. This
page is the page that holds the information necessary to call on the various
HTML pages that will appear in your individual frame panes. Remember
the name of this document when you save it (often index.html or Default.html)
as this is the page that should be referenced when you want to link to your
entire framed website! You will know
that you working with the Frameset page by checking the title bar of your
open window, or by checking the Properties window.
3. Note that at first you are viewing the Frameset page. This
page is the page that holds the information necessary to call on the various
HTML pages that will appear in your individual frame panes. Remember
the name of this document when you save it (often index.html or Default.html)
as this is the page that should be referenced when you want to link to your
entire framed website! You will know
that you working with the Frameset page by checking the title bar of your
open window, or by checking the Properties window.  4. To switch between the different parts of your frame layout,
it may help to bring up the Frames window,
which can be found under the Window
menu. Clicking within the Frames window allows you to switch between
your frames and change the properties of each one, including the main Frameset
page.
4. To switch between the different parts of your frame layout,
it may help to bring up the Frames window,
which can be found under the Window
menu. Clicking within the Frames window allows you to switch between
your frames and change the properties of each one, including the main Frameset
page. 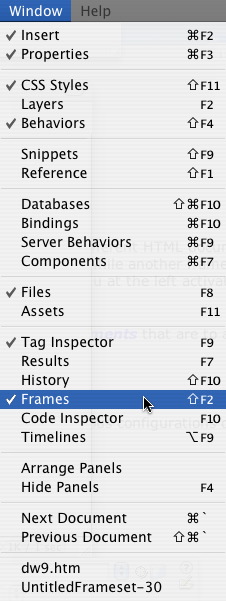
Working with Individual Files Within the Frameset
You can begin working with any of the individual pages that
are part of the frame by clicking inside its corresponding pane. Remember
that each pane is an individual HTML file that must be saved separately! Click here to watch a video demonstrating switching between
different documents within a frameset
Setting Targets for Links Within the Frame Structure
Many people who work with frames wish to use one frame as
a navigation menu, with content appearing in a different pane within the
frameset. To accomplish this task, you must set targets along
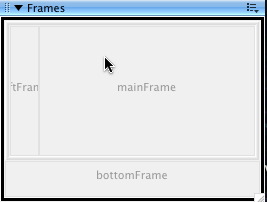
with your links. Note that each frame pane has a name -- by default these are
usually MainFrame, LeftFrame, and so on. You may change these names if you
wish by choosing the frame from the Frames Window (see
above) and altering its name in the Properties window. When you create a link, you must set
a target for that link if the linked content is intended to appear
in a different frame pane. So, if you have a link in the left-hand pane
that, when clicked, should show its content in the right-hand pane, you
must set the target to the appropriate frame pane. To do this, as you are
creating the link, make sure you check the Target popup menu and select
the correct frame for the link to appear in. For more information on creating
links, see the Hyperlinks section.
- The _blank target always indicates that the link will open
in a new window.
- The _parent target always indicates the the link will open
in the parent frameset of the frame the link appears in, replacing
the entire frameset.
- The _self target opens the link in the current frame, replacing
the content in that frame.
- The _top opens the linked document in the current
browser window, replacing all frames.
- The names of each of your frames will appear in this popup
menu for you to choose from as long as you are working within the frameset
document.
 Click here for a video demonstration of setting a link with
a target and then seeing that link in action
Click here for a video demonstration of setting a link with
a target and then seeing that link in action