Adobe Photoshop - Getting Started
- Getting Started with Photoshop
- Basic Image Editing Tools and Tips
- Using Layers and Masks
- Creating Web Graphics
- Exporting Images for Specific Purposes
Adobe Photoshop is perhaps one of the most well-known and revered commercial programs for graphic design. Now in version 10, or "CS3", Photoshop is most known for its ability to edit digital images and photographs to create new effects, fix lighting and color problems, and use powerful drawing and layering tools to design works of art.
While in the past, Photoshop's icon has appeared as various forms of a stylized eye on a photographic background, the current CS3 icon is merely a "PS" on a blue background.
When you first open Photoshop, you will be presented with your workspace. To start working on a file, you must either open an existing graphic file (GIF, JPEG, PNG, PSD, EPS, and many other formats are supported), or create a new one.
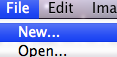
To start working on a new file, into which you may paste images from other places or draw your own shapes and text, click the File menu, and choose New. To open an existing file, choose Open from the File menu instead.
If you are starting a new document, you will be asked to set the parameters before you begin. This will help you determine how large your window and final project will be, as well as the colors, resolution, and other settings.
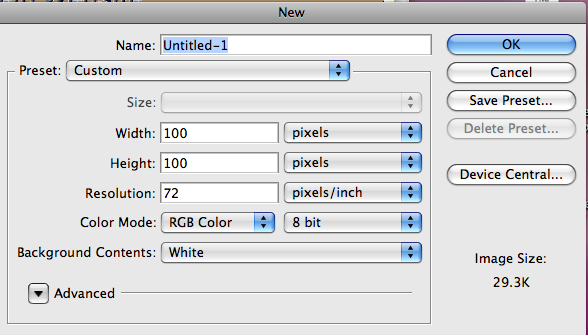
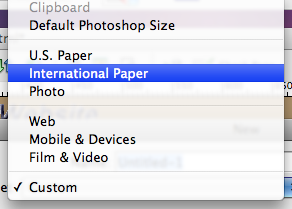
Note that you can use Presets to set up your document quickly, if it matches any of the preset document types.
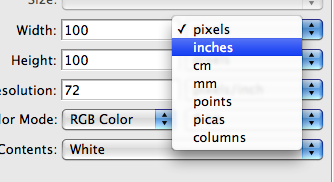
You can also change your own width, height, and resolution on your own, using whatever measurement type you are most comfortable with by choosing from the popup menus alongside each entry box. For example, graphic designers who work most with printed projects often prefer inches or picas; however, Web designers and digital artists often measure in pixels instead.
Take note that the higher the resolution, the larger your file will be. Usually resolutions of 300 and above are desired for working with high-quality photographs and documents intended for print, while 72 pixels per inch is ideal for Web images. Also, the Color Mode refers to the available colors in the document; RGB color at 8-bit is a general-purpose setting that will serve most digital designers well, but CMYK, Grayscale, or Lab color at higher bitrates may be more suitable for certain types of photography or print documents. Note that, like higher resolutions, higher bitrates (or higher numbers of available color gradations) will increase the size of the file Photoshop creates.
The Photoshop Workspace
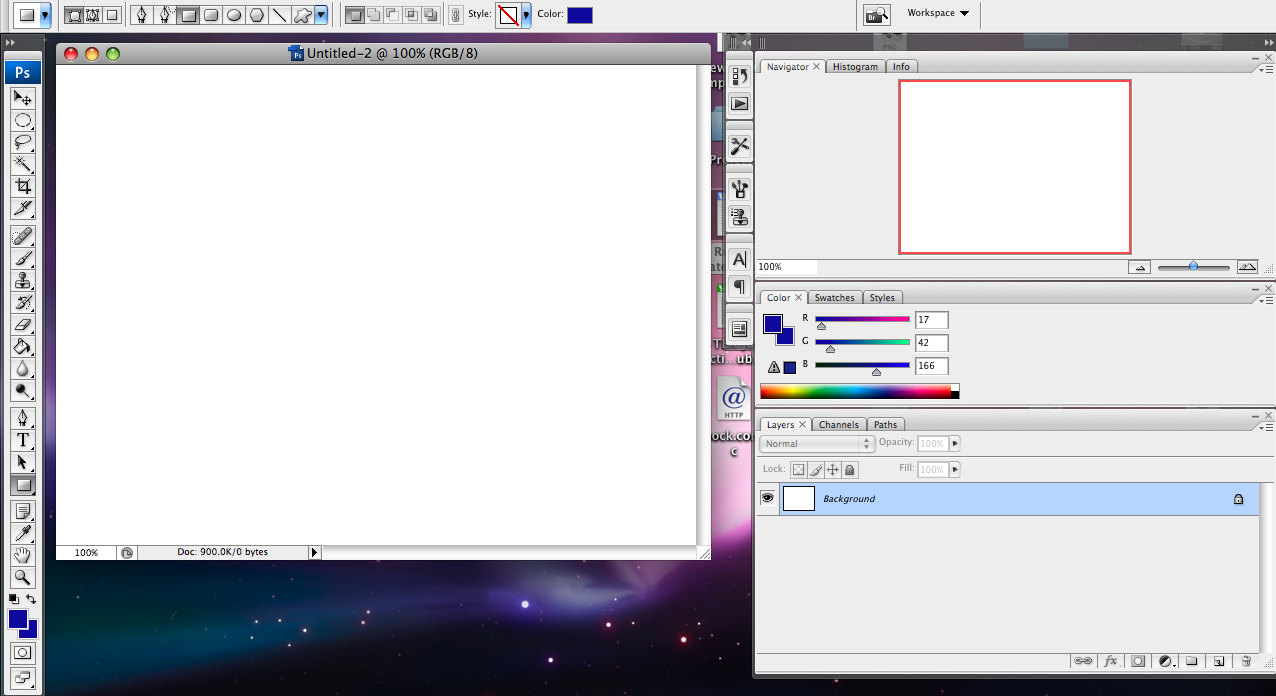
Photoshop's default workspace contains several helpful windows, including the Tools window on the left-hand side of your screen, the Options toolbar across the top, and the Navigator, Color palette, layers window, and other optional windows on the right-hand side. An example of a typical Photoshop workspace appears below.
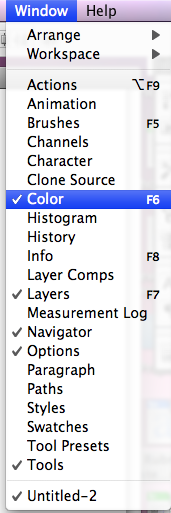
Note that any window can be closed or opened and brought to the foreground through the Window menu, so do not be afraid to close or switch windows using available tabs or collapsible title bars (in CS3, all windows are collapsible using the gray bar along the top of the window). Most everyday Photoshop users will likely need little more than the default workspace presentation, however, so keep this in mind.
The Tools
The Tools are essential to creating and editing things in Photoshop. The following describes each tool on the Tools window in order, from top to bottom.
| The Move Tool: This tool allows you to select and move bitmapped graphics (such as something you pasted or imported) around onscreen. | |
| The Marquee: This is a selection tool, and you can use as a square or oval by holding down the Mouse button while clicking on the tool, to select portions of the image to change or remove. Selected, or "marqueed" items will be highlighted with a blinking line. | |
| The Lasso: The Lasso tool works similarly to the marquee, except that it allows for more precise shapes that are not necessarily circular or square. Simply click and drag around the part of the image you want to select while the Lasso is selected to see how it works. | |
| The Magic Wand: Another selection tool, this one allows you to click anywhere on the image and select everything that matches the color you clicked on. This is ideal for times when you have a background against a clearly outlined image that you would like to change or remove. | |
| The Crop Tool: Crops out rectangular portions of the image to hide or delete them. Use this tool by clicking and dragging on your image to create the crop rectangle, which can then be fine-tuned afterward. | |
| The Slice Tool: Allows you to draw and select (click and hold the mouse to select the Slice Selector, or hold Control on Windows or Command on a Mac while using the Slice tool) slices, which can be used in Web graphics to add "hotspots" where users can click to go to URL hyperlinks. Double-clicking a created slice allows you to change the hotspot options. | |
| The Healing Brush: A truly useful tool to clean up photographs. You can Option-click on any portion of your image to "pick up" a good section of the image and then click to fill that section into others. For example, if you have taken a photo of someone whose skin appears ruddy, you can use the healing brush to brush in portions of the person's skin tone over the ruddy sections to make the skin tone and texture appear smoother. | |
| The Paintbrush: Allows you to draw/paint with the selected foreground color. | |
| The Clone Stamp: Allows you to pick up a portion of your document and "stamp" it anywhere else on the page. Option-click on the portion you want to clone first, then click to make your stamp. | |
| The History Brush: Allows you paint in details from a previous version of the image, before you edited it. For example, if you deleted the background from a logo but want to paint in the background just behind one part of the logo, you can use the History Brush to do this. This way, other changes you made since the background removal will not be affected. | |
| The Eraser: Erases portions of any image by clicking and dragging over the part you want to erase. | |
| Paint Bucket and Gradient: The paint bucket will fill in any section you click on with the color chosen at the bottom of the Tools window. Click and hold on the paint bucket tool for the Gradient tool, which allows you to fill in areas with gradated color sequences instead of just one color. | |
| Blur/Sharpen/Smudge: The Blur is available by default; click and hold the tool to select others. All of these tools allow you to spot-alter portions of the image by clicking and dragging. For example, try sharpening shadowy areas of a picture, or blurring or smudging the advertisements on a background billboard. | |
| Dodge/Burn/Sponge: These tools work similarly to the blur/sharpen/smudge tool, but they alter colors in different ways instead of the sharpness of an image. Good for blending a color that stands out too much to make it less noticeable. | |
| The Pen Tool: The Pen allows you to draw and create shapes, either through a series of lines that link together, or in a freeform fashion. The selected foreground color from the bottom of the Tools window will be the fill color between points on your pen drawings. | |
| The Text Tool: Allows you to write text onto your image in any font, size, or style you desire. | |
| Path Selector: This secondary "black arrow" lets you move and reshape anything drawn with the Pen or Polygon tool. | |
| Polygon Tool: Allows you to draw various rectangles, ovals, and many-sided polygons by clicking and dragging across your document to create shapes in the size that you desire. You can always resize and change their location on the page with the Path Selector directly above this tool. | |
| Notes: Allows you to add a note on the image that only you or someone else editing your image in Photoshop will see. For example, if you wish to write down where you found a particular clip art image, or how you achieved an effect for future reference, the Notes are a good place to do this. | |
| Eyedropper: Use the Eyedropper to "pick up" any color on your computer screen that you would like to use as the foreground (fill) color. | |
| Hand: Moves elements that cannot be moved with the Path Selector or Move tool, such as Notes. | |
| Zoom Tool: The magnifying glass lets you zoom in on your document without going to the View menu each time you wish to zoom in or out. Hold Option while clicking to zoom out; simply click on your document to zoom in. | |
| Foreground and Background Colors: Click the color boxes to change the colors you are using to fill polygons, paint with the brushes or paint bucket, and write text. | |
| Quick Mask Mode: Use this to edit just any selected portion of the image (from the marquee, lasso, or magic wand). The Quick Mask separates the selected portion from the rest of the image to allow you to edit it without accidentally making changes elsewhere. | |
| Change Screen Mode: Allows you to switch to full screen mode to work on large images more easily. |
About Graphics Files and Formats
Different graphics programs produce different file
types and formats. Most programs have a “native” file type
(i.e.,
Fireworks has the native type of PNG, Photoshop uses .PSD, and
so forth), but they allow the user to export their files as other types.
Photoshop can save as many types of graphics, including those meant for
very specific applications such as desktop publishing and illustration.
For example, for example, many files intended for print are saved as
TIFF as this format retains very high quality and does not compress the
file size.
Computer graphics come in two basic categories: vector (also called object-oriented) and bitmapped. Vector graphics use mathematical formulas to determine where the individual pieces will go to make up the whole image, and those formulas can be performed many times to allow the user to reshape the image. For example, if a user has created an onscreen drawing of a car, she may move and alter just one wheel without erasing part of the image and starting over again. Vector images are created generally by drawing applications such as Adobe Illustrator (.ai or .eps) or CorelDraw (.cdr). The Windows Metafile format (.wmf) is also a vector format associated with Windows-platform drawing tools.
Bitmapped graphics, on the other hand, are comprised
of individual bits, or pixels. If you look closely at a computer
monitor, you can see how each image is made up of tiny individual dots — those
are pixels. Bitmapped graphics,
then, use pixels to make up a whole image on-screen, and thus they must
be edited as a whole. JPEG, GIF, TIFF, BMP, PICT, and PNG are all bitmap-
type image formats.
The most common and useful file formats in use on the Web and in multimedia applications (i.e., Word, PowerPoint, Dreamweaver, etc.) are JPEG (.jpg), GIF (.gif), and PNG (.png). These are universal formats — meaning they can be viewed regardless of the operating system you are using — and they are the formats most often used on the Web. The JPEG and PNG formats can display millions of colors in a single image, and thus they are usually used for photographs and other high-quality graphics. JPEG is also a compressed format, meaning that a file formatted as a JPEG takes up a very small amount of storage space compared to other formats. PNG combines the greater color and quality capabilities of a JPEG with the animation and layering abilities of a GIF, making for small file sizes (although not necessarily as small as JPEG) and high-quality images. Some older Web browsers do not fully support the display of PNG graphics, however.
The GIF format can display up to 256 colors and is
usually reserved for simple graphics, such as logos or buttons. GIF files
are not compressed as highly as JPEGs, so a large image with the maximum
number of colors will take up
more room as a GIF than a comparable image saved as a JPEG. To bring
GIF file sizes down, a user might cut out the
number of colors used in the image, although picture quality is often
lost in this process. However, only GIF images can be used in creating
animated graphics for the Web.