Tables
- Navigate to:
- Word Basics
- Fonts and Styles
- Basic Text Formatting
- Clipart
- Tables
- Columns
- Headers and Footers
- Using Mail/Data Merge
- Video: Mail Merge on the Macintosh
- Video: Mail Merge in Windows
- Reviewing and Editing Documents
Text and images may be organized into a table for easier viewing in your Microsoft Word document. Examples of good uses for tables can include organizing pictures with captions, authors' names with books they have written, or displaying data about various cities and their population growths by year.
1. There are several different ways to create a new table in Word, and one of those ways is to click the Table menu, drag down to Insert, and click on Table.

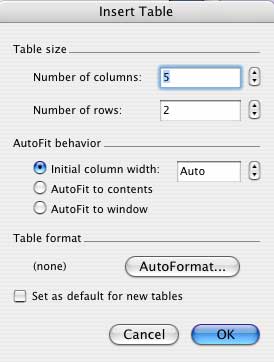
2. The Insert Table window appears. This will allow you to select how many rows (horizontal) and columns (vertical) you will have in your table. You may always add to your rows and columns later if desired. You may also decide on the column width and whether you want rows to automatically expand to accommodate what is inside them (AutoFit).
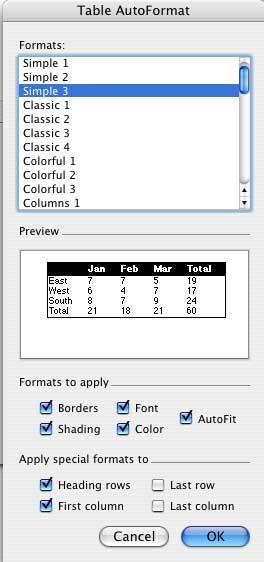
3. One useful feature in Word is the ability to choose from a list of a different table styles, known as AutoFormat. As you scroll through the list of styles, a preview of how your table will look appears below. You can also choose to apply the style to some or all parts of the table by checking or unchecking the appropriate boxes at the bottom of the window. When you are finished, click OK to return to the Insert Table window.
4. Click OK again, and your new table will appear in your document. You may click inside any cell, or row-column intersection, to type or insert graphics.

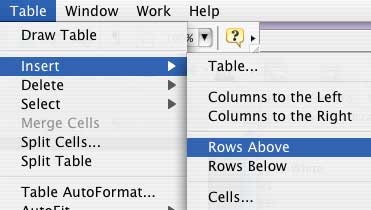
5. If you wish to add more columns or rows to your table after it is created, simply return to the Table menu, drag down to Insert, and click the appropriate command from the submenu. From this menu, you may also perform other tasks, such as changing the table's AutoFormat, splitting the table in different pieces, or deleting rows or columns.