More Advanced Animations - Shape Tweens and Motion Guides
- Understanding Flash
- Built-in Templates
- Simple Tweening
- Advanced Tweening
- Essential Interactions
- Converting Video to Flash
- Quizzes and User Input
- QuickTip Interactions
- Drag and Drop Interactions
In the basic tweeing guide, you learned how to create simple animations by creating or importing a visual element such as a graphic, creating a keyframe at a point further down the timeline, moving that object on that keyframe, and then adding a motion tween between the two keyframes. This creates a linear movement of the object from the first location to the second. However, sometimes a simple straight line of motion is not enough, and that is where Shape Tween and the Motion Guide can come in handy.
Shape Tweening
1. In your Flash document, create a simple shape with the Drawing tools, such as an oval or a rectangle.
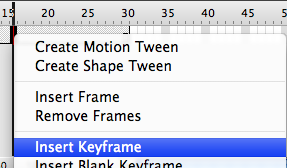
2. Next, go to your Timeline and right-click (or Control-click) on any frame of your choice, and insert a new Keyframe.
3. At this new keyframe, double-click on your first shape and hit Delete/Backspace on your keyboard to remove it. In its place or even elsewhere on the stage, create a new shape, different from the first. You can choose new colors, if you like, as well.
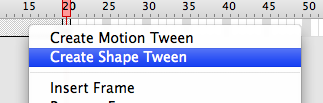
4. Right-click anywhere between your two keyframes in the Timeline and choose to Create Shape Tween.
5. Test your movie from the Control menu, and you might see something similar to the animation below.
Shape tweens work only with drawn, vector-type graphics, but that does not necessarily mean you are limited to simple drawings of ovals and rectangles. With some artistic skill and some time, you can create flowers that open, faces that change expression, and plants that grow into trees.
Using Motion Guides for Non-Linear Motion Tweens (for version CS3 and below)
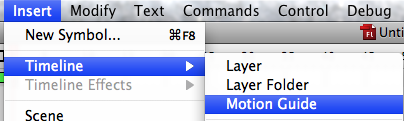
1. If you want your motion animations to move along a non-linear path in versions of Flash including CS3 and below, such as moving in an arc or a circle, or making loops across the screen, you can use the Motion Guide to support your motion tweens. To do this, first create a simple motion tween (for reference, go back to the Simple Animations tutorial). Once you have this animation complete, click the Add Motion Guide button in the bottom of the Timeline window, or alternately, click the Insert Menu -> Timeline -> Motion Guide.
![]()
2. You will have a new layer in your timeline, your original layer and a Motion Guide layer. Click in the first frame of this new layer.

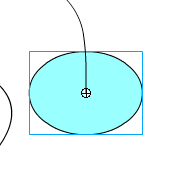
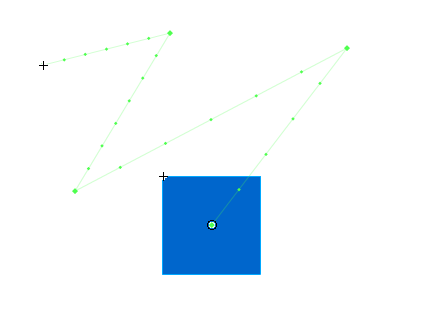
3. Use the Pencil Tool (the Brush tool also works) to draw the line you want your animation to follow when it is complete. Note that any drawing you make in the Motion Guide layer will not be visible in the final product.
![]()
4. Your final step is to make sure that the shape will follow your newly drawn path. Click and drag your shape in the first keyframe of the animation layer and in the last keyframe of that layer so that the center of the shape "snaps" into place at either end of your path.

5. Once you have done this, you can test your movie from the Control menu, and see something similar to the animation below.
Motion Tweening in Adobe CS4
New to version CS4 is the Motion Editor, a powerful feature that allows for a new kind of "motion tween" to be added to your animations. There are many differences between the concept of a motion tween (now known as a "Classic" tween) in older versions of Flash as opposed to the new version. CS4 motion tweens can be applied to any single object, includig 3D objects, and can create non-linear animations in a similar way to the effects of the Motion Guide layer in CS3 and below. In many cases, Flash developers will prefer a Classic Tween (see Basic Animation for more), but there are some times when a motion tween will be preferred when using Flash CS4.
1. First, choose an object on your Stage to animate, and ensure that it is a Symbol of some kind (Button, Movie Clip, or Graphic). To do this, right-click (or Control-click) on your object and choose Convert to Symbol. The name can be anything you like, but it should be representative of what the object is. For Motion Tweens in CS4, it does not matter what kind of symbol your object is, as long as it is a symbol and not just a shape or imported object.
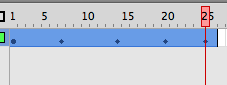
2. In the Timeline, right-click or Control-click to any point and Add Frames if there are not already some frames available to use. You can also simply insert a keyframe here, but the Motion Tweens in CS4 do not use keyframes for action, unlike Classic Tweens. So, a keyframe is not necessary at this point.
3. Now, right-click or Control-click one more time in your Timeline and choose Create Motion Tween. All empty frames between the the keyframe where you symbol is and any new keyframe you created further down the Timeline will turn blue - this is where you will be able to add your motion animation.

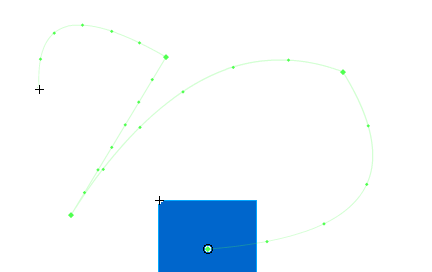
4. Now, you can click to any of the blue frames within your Timeline and move your Symbol around on the stage. You will see a thin green line follow your symbol's movement. So, each time you wish to have your symbol move elsewhere on the stage, choose a different frame and move the symbol again. The timeline will indicate each frame of movement with a small blue diamond.
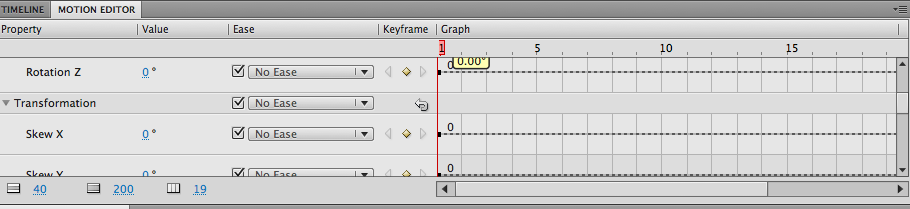
5. If you wish, you can drag the green motion lines around to create curving shapes instead of straight lines as well. You can also enter the Motion Editor from the tab within the Timeline window to create more complex or precise animations, add color effects, and more. Simply click the blue number values to change them, or alternately, drag the slider bars up and down as needed.