Creating "Float-Over" (QuickTip) Interactions
- Understanding Flash
- Built-in Templates
- Simple Tweening
- Advanced Tweening
- Essential Interactions
- Converting Video to Flash
- Quizzes and User Input
- QuickTip Interactions
- Drag and Drop Interactions
Sometimes, it is helpful or necessary to have a "quicktip" on a Web page, where when the user floats his or her mouse cursor over an image or block of text, a small window pops up with additional information. You can see examples of this throughout the Web, such as at many retail sites where floating the cursor over an image presents the user with a bigger version of the image to show detail.
Looking for an ActionScript 3 version of this tutorial? Check out:
- http://flashadvanced.com/actionscript-3-tooltips/
- http://www.freeactionscript.com/2009/07/dynamic-tooltip/
- http://abrahamyan.com/2009/02/05/tooltip-in-as3/
To create a QuickTip interaction:
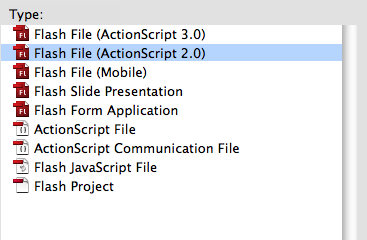
1. Once again, we will start with a new, blank ActionScript 2.0 document. Of course, it is not necessary to start with a new document and you can insert a quicktip interaction like the following into any Flash animation.
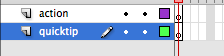
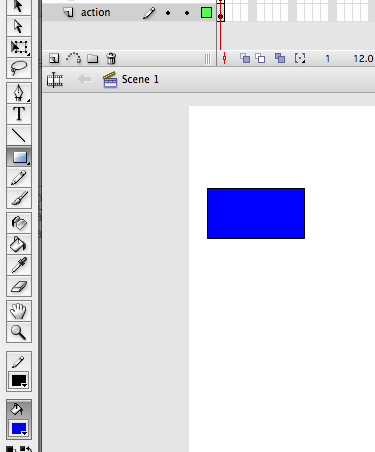
2. Use the New Layer button in the bottom left-hand corner of the timeline to create two layers in your document, one called "quicktip" and one called "action".
![]()
2. Now, click on Frame 1 of the quicktip layer and draw a shape, such as a rectangle, using the drawing tools. The purpose for this step is to create a button that will serve as the "hotspot," or the place where the quicktip will be triggered when the mouse rolls over it, so there is no need to do anything other than draw a simple shape at this point.
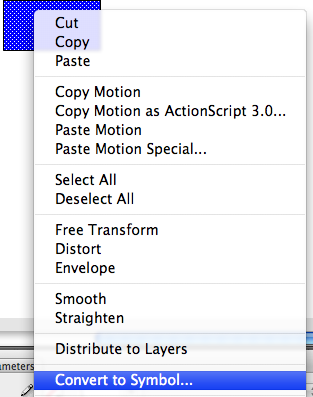
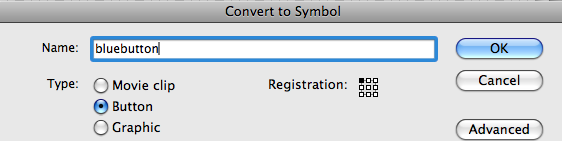
3. Once you are satisfied with your button, right-click (or Control-click) on it to Convert it to a Symbol. You will want to change it to a button symbol - the name can be anything you like.
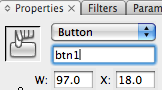
4. Once you have changed the graphic into a button symbol, you must name this instance of that symbol by changing its name in the Properties window. Again, the name can match mine, or be anything you like. However, avoid the use of spaces or non-text characters other than underscores, numbers, or dashes, in your naming.
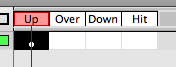
5. Each button has four states in Flash - the up, over, down, and Hit states - as you may remember from other tutorials. These define how the button looks when it is being clicked, as well as what the clickable area of the button actually is. To set these states, use the Black Pointer tool and double-click on the button to go to its timeline.
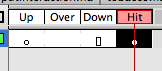
6. For our QuickTip interaction, we need to create a hotspot that is actually invisible onscreen. To achieve this effect, click and drag the keyframe from the Up state to the Hit state. Your timeline will appear as shown below if you did this correctly.
7. Return to the main timeline by clicking Scene 1.
![]()
8. Your button will now be a light blue color, and can be positioned on the stage wherever you may need it to be. You can even change the size of the hotspot if needed using the Free Transform tool.
![]()
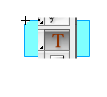
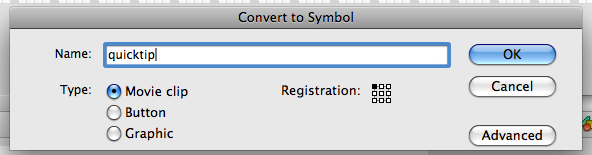
9. Now, you will need to create a second shape on the quicktip layer, this time right-clicking on it and converting it to a Movie Clip Symbol. This symbol will become the placeholder for your quicktip text. Note that it does not matter where you position this shape on your stage - the position of this symbol will be dynamically set later on.
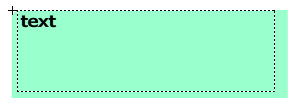
10. Double-click on your Movie Clip symbol and choose the Text tool. Draw a box within your Movie Clip symbol for your text to go, and add some dummy text so you can see what text will look like within this area. Change the properties of your text style as needed, including:
- Set the Text Box properties to Dynamic Text
- Change the line type to Multiline
- Click the Render Text as HTML widget, next to the line type popup menu
- Be sure to give the instance a name, such as "quicktip_txt"

Your text properties should look a lot like what you see above, and your text box should be aligned so that it is just inside the Movie Clip symbol.
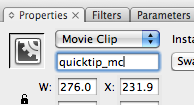
11. Return to Scene 1, and single-click on your movie clip to bring up its properties once again. Be sure it is has a name, such as "quicktip_mc," before continuing on.
![]()
12. All that is left is to script the interaction. Open your Actions Window from the Window menu and make sure that you are adding actions to Frame 1 by looking to the left-hand sidebar. Add the following script, replacing any names of the movie clip symbol, the the text box within the movie clip, or the button as appropriate. In the example's case, the button was named btn1, the movie quick quicktip_mc, and the text box quicktip_txt.
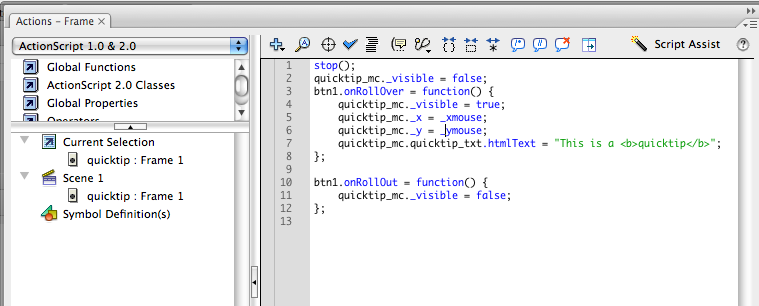
The script first stops the movie so that interaction by the user can be performed. Then, the script tells Flash to make the quicktip movie clip initially invisible (visible=false), so that it will not appear until the user rolls the mouse cursor over the hotspot button. When the user does this, the script tells Flash to make the movie clip visible at the current X and Y coordinates of the cursor, and to display the text, "This is a quicktip" inside the text box. The <b> and </b> surrounding the word "quicktip" is HTML code to make the typeface bold. This could easily be <i> for italic as well, although note that within this particular Flash operation, only rudimentary HTML tags like <b> and <i> can be used.
Finally, when the user rolls away from the hotspot button, the quicktip movie is told to become invisible once again. Try it in the example file below.