
Converting Video to Flash
- Understanding Flash
- Built-in Templates
- Simple Tweening
- Advanced Tweening
- Essential Interactions
- Converting Video to Flash
- Quizzes and User Input
- QuickTip Interactions
- Drag and Drop Interactions
Flash can import video files in the QuickTime (MOV) or Windows Media (WMV) format and convert them to Flash video (FLV). Converting large video files into Flash will limit the need for viewers to download additional software in order to view your video content. Flash is typically available by default on both Windows and Macintosh platforms, but QuickTime and Windows Media Player are not native to one platform or another, and must be downloaded indepedently by the user (see Sound and Video on the Web). In addition, Flash video tends to produce a smaller, more easily downloadable file that still retains a high level of quality, and can be integrated into other Flash interactions.
To import and convert video into Flash Video:
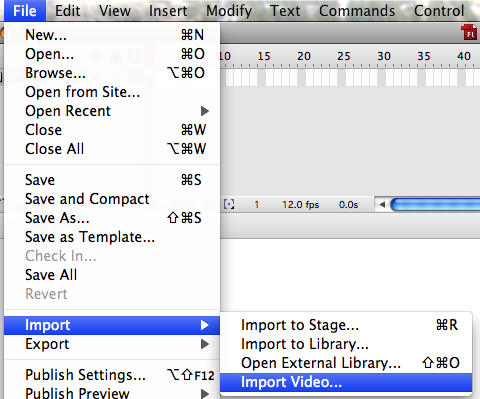
1. Click the File Menu and choose Import -> Import Video.
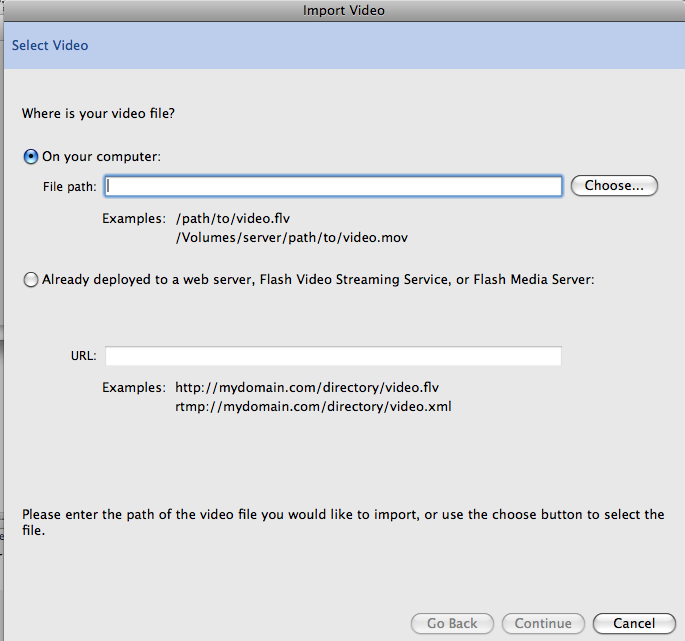
2. Choose the location of your video file to be imported. This could be a FLV, QuickTime, Windows Media, or AVI file located on your computer, or it could be a file located on a Web server to which you have access.
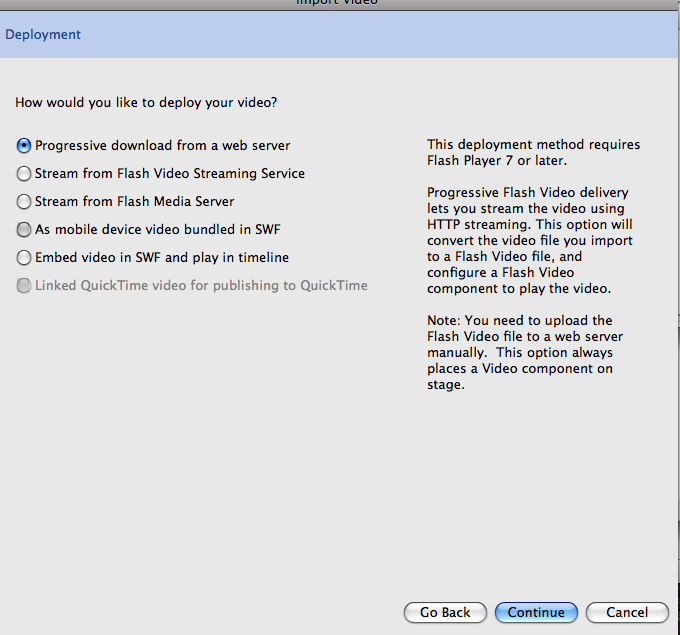
3. Next, decide how you want to display this video content. In most cases, especially if your video it is longer (more than several minutes in length), it may be a good idea to choose to make a progressive download, so that it will start playing immediately and continue to download while the viewer watches. If you have access to a Flash media server or streaming service, choose these options instead. If you plan on using a mobile device, such as a Flash-capable cellular phone, or if you wish to use the video with a QuickTime streaming server, choose these options. Embedding the video into the Flash timeline is best only for very short clips, as it will increase the overall size of the Flash SWF when it is published dramatically. You may also experience audio synchronization issues with this method.
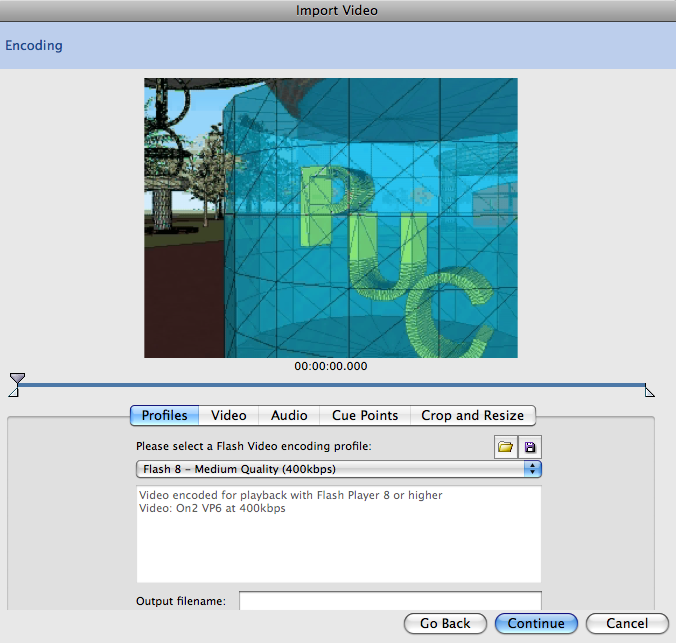
4. In the next screen, decide how the video will be encoded. In most cases, the default options are all you will need. However, you may want to investigate each of the tabs within this window, including the Audio and Video tabs in particular, to make sure that the quality of your finished product will meet your expectations. The Crop and Resize tab may also be useful if you need your Flash video to fit within a certain size.
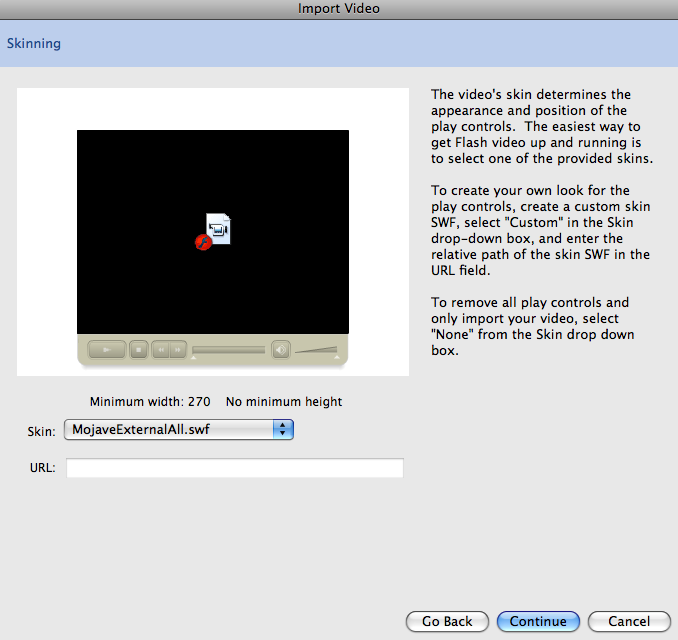
5. Next, if you want play controls for your video, choose from the many built-in options Flash provides. When you choose one, you will see a preview of what the player will look like. If you are a Flash developer and already have a custom player bar you would like to use, you can choose Custom in the popup menu, and provide the path or URL to your SWF file in the text box.
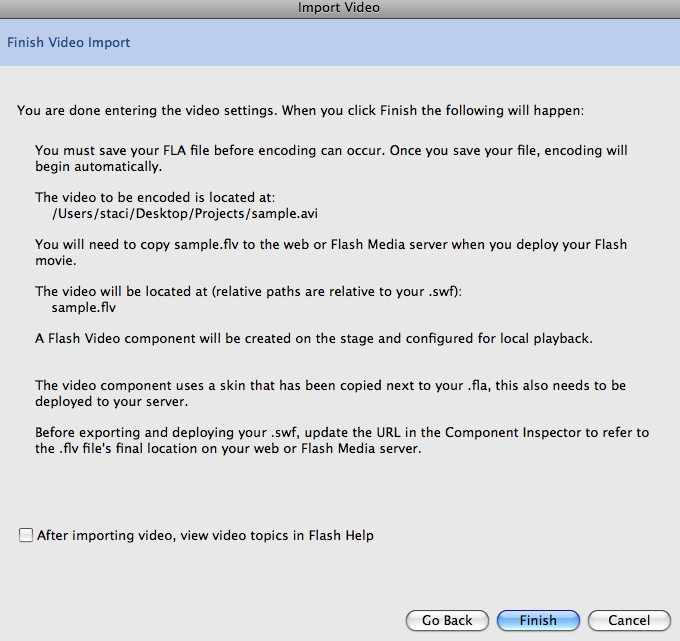
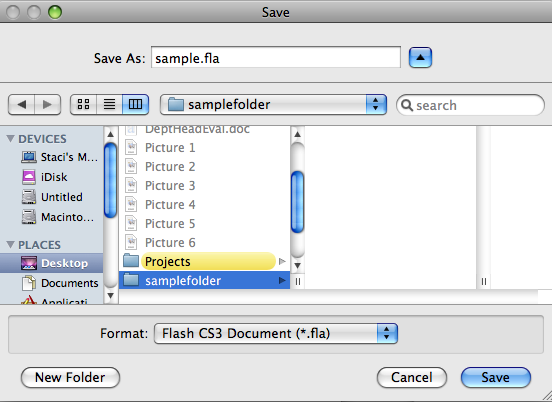
6. In the final step you will receive some information about what will happen next - read this information carefully. When you are ready to let Flash import and encode your video, click Finish. You will be prompted to save your work - both an FLA and FLV file, as well as an additional Javascript and SWF file if you chose to add a player bar - before you continue.
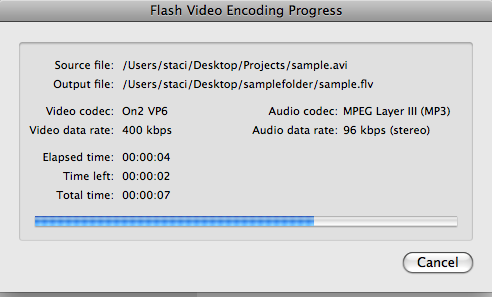
7. Depending on the length of your video, the encoding process can take just a few minutes or several hours. Be patient and allow the process to complete. Note that you cannot work on other documents in Flash while a video is being encoded; however, you can work in other programs on your computer while you wait. When the encoding is finished, you will be taken to your Stage with your video inserted, where you may move it around and add other objects to the Stage, just like any other Flash document.
8. While working with your Flash document, you may wish to decide whether the video should play automatically, or whether the viewer has the choice to start the video at will. By default, Flash movies are set to play automatically, but if you would like to change this setting, click once on the video object in your Stage and then click the Parameters tab within the Properties Window (choose Window -> Properties if you do not see your Properties window in your workspace). Change the AutoPlay option to False if you want the viewer to have total control over when he or she views your video.

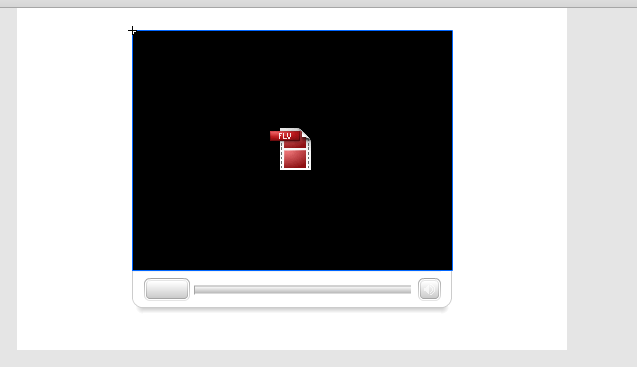
9. Once you complete working with your Flash document, you can Publish your work from the File menu to create an SWF file for use on the Web or in other applications, such as what you see in the sample Flash video below.
NOTE: Your FLV file MUST always be in the same folder with your SWF file wherever you decide to place your work (such as on a server), unless you chose to embed the video in the timeline during Step 2 of importing your video. Failure to do so will result in a non-working video. Additionally, player bar files MUST be located in the same folder as any HTML file where you can inserted related Flash video media, or the player bar will fail to appear.