
Interactive Image Maps
- Getting Started
- Site Management and Templates
- Hyperlinks
- Links and Anchors
- Cascading Style Sheets
- Publishing
- More Resources
- Tables and Divs
- Frame Layouts
- Image Maps
- User-Input Forms
- Spry Widgets
- Pop-Up Menus
- Behaviors
- Images
- Media Elements
- Rollovers
- Video & Multimedia
Creating an interactive image is easy with Dreamweaver. All you need is an image to work with and some links, and you are ready to go!
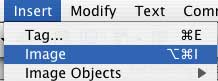
1. First, insert an image into your Dreamweaver document by clicking the Insert menu, and choosing Image.
2. Click on the inserted image to select it. Then, in the Properties window (choose Properties from the Window menu if it is not visible), find the Hotspot icons on the left-hand side of the window. Click the hotspot type (rectangle, oval, or polygon) that best suits your needs.
![]()
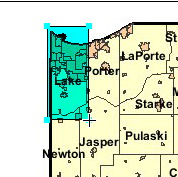
3. Your cursor will change into a crosshair. Click and drag over the portion of your image that you want to change into a clickable hotspot when the page is viewed in a web browser. A green shape will appear to indicate that area is a hotspot.
4. Each hotspot will need a link, and the Properties Window will allow you to alter those properties. Give your hotspot a link, a target (if needed), and an Alternate text name (if desired).

5. When you're finished adding hotspots and links, you can click the File Menu and choose to Preview your page in a Browser (see Getting Started). Drag over the places in your image where you added hotspots and try the links!
The example below is an image map with interactive hotspots. Click on various places in the image to find out more about places in Indiana!
