
Publishing Your Pages
- Getting Started
- Site Management and Templates
- Hyperlinks
- Links and Anchors
- Cascading Style Sheets
- Publishing
- More Resources
- Tables and Divs
- Frame Layouts
- Image Maps
- User-Input Forms
- Spry Widgets
- Pop-Up Menus
- Behaviors
- Images
- Media Elements
- Rollovers
- Video & Multimedia
In order to publish a web page, you must have a web-hosting service of some kind that will use its servers to share your files over the Internet. The hosting service will provide you with a URL, or Internet address, that can be used by others to see the information available on your web site.
Some things to remember when making web pages:
When uploading your pages to any of the hosting services, ensure that all of your graphics files, audio files, and/or video files also get uploaded. It cannot be stressed enough how important this is! If you do not upload every file associated with your pages, they will not "work" on the Web. This is because, unlike a Word document, pictures, movies, and other files are not embedded into the page. Each file still exists as a separate entity that must accompany your web page wherever it goes if you expect it to appear in a web browser. The only elements of an HTML page that are actually part of the page are text, links, and tables.
If you take clipart or other graphics from other people's
websites, be very careful that you are not violating copyright laws. Many
websites state specifically when images are copyrighted, and while some do
not allow you to use their images at all, others will only so long as you
state in your web page where you acquired the file. Additionally, there are
many websites that offer collections of royalty-free clipart, which are free
for you to download and use in your personal web pages. Try Clipart
Connection or Clipart.com for
"free clipart" or "free graphics" in any search engine.
To download a graphic you like from a web page, simply right-click (Windows)
or control-click (Macintosh) on the image you wish to download, and choose
to save the image file to your web folder. Once you have the file saved,
you may insert it into your web pages using your web page editor.
Publishing through Dreamweaver
You can use information from your own server to upload files directly from Dreamweaver easily and quickly. If you have not yet defined your site, review the Managing Your Sites section for help.
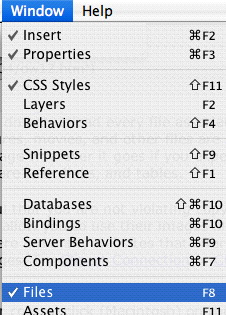
1. If you don't already have it open, open the Files Window by choosing it from the Window menu.
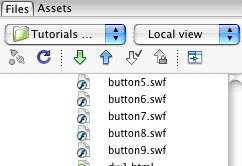
2. Your files inside your site will be listed for you. You can select all of them or simply click on one at a time to select files, then click the blue "up" arrow to Put files on the remote site. Whether it is WebDAV, FTP, or some other remote type of site, as long as you can connect to it, Dreamweaver will take care of the rest.
![]()
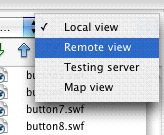
3. The Files window will also allow you to see what currently resides on the Remote site by clicking the right-hand popup menu and choosing the appropriate view. Most people will typically just use the Local view (their disk or computer hard drive location) and Remote View (the server location). In the Remote view, you can click on a file in the list to select it then click the green "down" arrow to download a file from the server to your local location.
![]()